Recently I showed you where Daffodil spent the winter. She was safe and secure and dry. That was important because you may recall that her roof and some of her siding was off and two of her windows had been taken out. We had planned to work on her through the winter but life brought some changes that put those plans on hold. It was Springtime before we could start working on her restoration again. Let’s go inside her winter shelter and see what’s going on. My sweetheart has removed the tarps that covered the open roof and windows. He has her opened up and he's working inside. It looks like he has headphones on so he can listen to music. No music today - he's been using loud power tools so he has his protective ear 'gear' on.

Come inside for awhile – we can stand back and watch him work. Watch your step – his ‘workbench’ takes a bit of space. He has carefully laid out things he needs to use during the restoration project.

Today he’s beginning to stabilize Daffodil’s structure – her underpinnings. When we removed all of the interior paneling we discovered the cause of a problem we had noticed on her exterior siding (called sheeting). The sheeting had split diagonally at both back corners and the split had been filled with caulking.

We didn’t know what had caused the split and we were concerned that it could happen again if we didn’t figure it out. The moment I removed the interior paneling off the back wall my sweetheart knew what had happened – and he knew what to do to keep it from happening again! The trailer was built using very thin boards on the back corners. They weren’t sturdy enough to keep the trailer from twisting a bit as she went down the road. She must have done a lot of twisting and shifting when her previous owner drove over dirt roads filled with potholes when he took her hunting high in the mountains of Oregon. The twisting and shifting back and forth made the sheeting tear from the corners of the back window to the outside corner of the trailer. My sweetheart checked up front and he decided that needed to be more stable, too.

It would take a lot of careful, tedious work but it had to be done. No one would ever see all the work he was doing, but these unseen changes would make a big difference! To start, he had to remove some pieces to make way for the stabilizing parts.
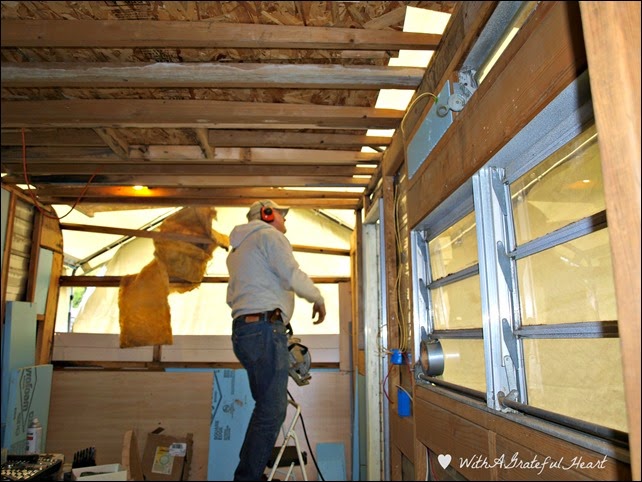
I have to detour a bit here because I see something I think you should see. Look in the far end of the side window on the right of the photo above. There’s a roll of duct tape! My sweetheart got tired of picking it up off the floor, or searching for it, so he found a place where it would stay until he needed it again. It doesn't move from there - he can always find it. It’s quite a clever idea, don’t you think?

Now, back to work! First, he had to measure very carefully. This old tool – a square – belonged to his father. Imagine the stories it could tell!

My sweetheart's work is precise – done right. To perfection! He’s very particular about things. Maybe that’s because he doesn’t want to take them apart and do them over again!

Two of the new pieces for the front corners seemed very complicated to me but it wasn’t long and he had them shaped and formed to fit perfectly.
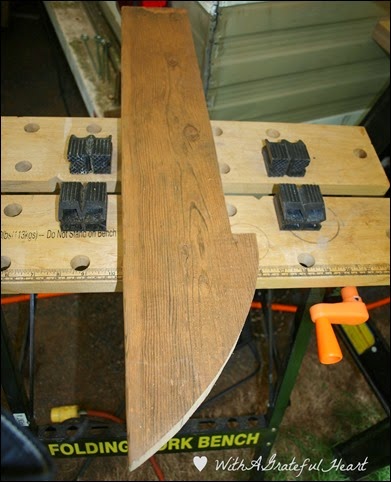
He carefully put the new pieces in place. . .

And then secured them so they would stay exactly where they need to be.

When the front corners were stabilized, he moved to the back. Stabilizing the back corners involved more than just adding more wood – it involved a major change that was the subject of much discussion. My sweetheart had removed the back window when the restoration first began. When it was removed we planned to put it right back in place when he was finished. With the changes needed on both back corners we would ‘lose’ a few inches of window space because of the addition of wider boards. There was no way around it – the old window wouldn’t fit. We would have to decide what to do about that. While we talked about it, thought it over and looked at our options he continued working on the back corners. Then, one day the structural work was finished. We felt like we had come to a major milestone – a turning point, you might say! Now we could start putting her back together again. I'm pretty sure I must have clapped my hands and jumped for joy as I stood outside of Daffodil’s back window opening and looked through toward her front window. My sweetheart’s hard work had paid off. Now we could start making this sweet trailer a thing of beauty. What we had dreamed of for so long could begin to become reality.

Things have changed since I took these photos. A new window has been ordered, broken panes in the front window have been replaced and some things are beginning to come together inside. I will share more very soon. It’s getting exciting and I can’t wait to show you what we're working on now!

 And here’s the way she looked from the back as she went down the freeway.
 If you’ve been watching her progress you will notice that there is no big back window anymore. That’s a story for another day. She will have her big window again but my sweetheart will need to work for many long hours to get it ready to install. Now, I would like to invite you to step inside and see where I will snuggle down and dream pleasant dreams tonight. I love the way the sun shines through the window and makes shadows on my bed.
 She is far from finished inside and the fun of decorating has only just begun. The quilt on the wheel cover in this photo has special meaning to me. It was a wedding gift from a dear lady who used to babysit me when I was a little girl. Many of the fabrics used in this ‘Trip Around The World’ quilt came from dresses and tops I made before I met my husband. These were the colors of that time and I loved them back then. She would be amazed that I still have the quilt and that it’s going to help keep me warm on chilly nights when Daffodil and I go away. I didn't put it on my bed because it's supposed to be hot this weekend.
 Remember the window I told you is not there? The big back window? The window opening was cut out of the paneling and all you can see is the metal skin on the back wall. No problem, I said. I have curtains – and I just won’t open them until the window is in place once again!
 Do you remember this ‘brand’ sign that was on the front of Daffodil? It looked pretty worn.
 Well, look at it now! My sweetheart and I teamed up to restore it to it’s original beauty. There is another one on the back, too.
 So, my friends – my secret is out. Daffodil and I have gone a-traveling. It's our first trip out together. When she comes home again there will be tales to tell and much work to continue the restoration. I’ll tell you about our weekend when we return and I’ll make sure you share every step of the journey until her restoration is complete.


